Wednesday, December 14, 2016

WINTER ARRIVES TOMORROW

Not officially, but in spirit. Temps day after tomorrow are forecasted at four above in the morning. So I'll show you what little I've done to fend off the cold. Then I'll show you a bit of barn work that I hope to complete before the real snow arrives after Christmas.
 
 
The Atlanta 60 pot-bellied stove I bought last year has finally been installed in the living room, and boy, does it run circles around the gas heater! Cheaper, too. The old coal insert is a great place to store the fuel.
 
 
Perks of the job. Antique cherry cutoffs from a flooring project were too small or too sappy to use in the shop. Trust me, I got some shop wood, too. At the top of the pile are 90 degree wood elbows, which are being cured for shelf brackets. Briar, bittersweet, and grapevine. My major crops! We have concords up here, as opposed to the muscadines down south.
 
 
A rick on the right and the pile of 500 year old antique longleaf pine cutoffs on the left. Cutoffs are for the firepit, which hasn't seen any use since spring. Got too hot too quick. The rick supplies the shorter pieces for the woodstoves.
 
 
So does this pile of cherry and birch, both plentiful on the farm.
 
 
Another acquisition from last winter finally installed in the shop. It does not get the surrounding cabinetry hot, either. Thing weighs almost three hundred pounds and takes a while to heat up, as opposed to the Atlanta, which gets hot very quickly indeed. There is a special insert for the thru-the-wall pipe, and note the cap to the left. I had all these attachments since 1997, bout time I used them.
 
 
Chimney without cap installed. The ladder sits on a pile of yew and dogwood, the signs made up the floor of the barn.
 
 
Speaking of the barn, here it is in early fall. The 1710 structure on the left, if you remember, has its front wall detached and leaning out towards the camera (note the plate with the bolt just below the eave; that's where the cable holds it in place).. But in September, I noticed it leaning towards the newer 1860s barn on the right (a separate structure). I had to do something before the snow loads took them both down.
 
 
Enter a trusty come-along, a large chain bought when I first got here, and a binder clamp. They  
connect the 1710 barn sill with the 1860s girt timber.
 
 
See?
 
 
Transferring the stress from the cable to the chain. That's what binder clamps are good for.
 
 
Sill plate. Timber-framed, 7x7 inches. It ain't goin' nowheres.
 
 
Scaffold to reach the roof, stifflegs to support the rafters as I work to remove eight layers of shingles, original roofers, and original cedar shakes. A nasty, dirty job.
 
 
But the stifflegs allow me to support the ladder in addition to keeping me from being killed by the falling roof. Which, of course, it didn't.
 
 
A good portion of the front roof removed, and one section of the back begun.
 
 
A month later, half of the back section is gone. The timbers and sheathing are all good on the gable end and rear of the structure, and will be kept in place with braces until spring, when I will remove the front wall and rebuild the structure.
 
 
Looks like a lot of work for one person, and it was, but it was done in two days spanning two months.
 
Next: The Kitchen Wainscot!

Saturday, November 12, 2016

NEW POST SOON
 
 
Sorry I've been away, but I've barn roof and kitchen progress that I'll post soon. Cooler weather is here and winter is coming, gotta get some stuff done. Keep checking, I'll post before the end of the month.

Wednesday, September 28, 2016

TOO HOT FOR WORDS


So I haven't been posting much. We had a nice cool spring up until mid-June, when nineties became the norm and the same number applies to humidity. We'd get a week of mid nineties followed by a couple of days in the eighties with lower humidity, then back to the oven. Jeez, it's why I left the south. Everyone says it's the hottest year they ever felt, but I haven't seen the season stats.

(As I finally post this on September 28th, the temps have moderated this week down to the seventies and sixties. We even had a thirty seven degree morning. So I'm doing better, but this was the hottest year on record in CT and RI, so there. Nyaaahh).

So starting in mid-June, I took to the basement. I know I'm supposed to be working on the kitchen trim, counters and lights, but my dirt-floored cellar is the only cool place on the property, so I have been busy down there.


First order of business; open the cellar window under the bathroom. Warm air enters and leaves as cool air. Not exactly a window, it's a hole that allows really large mosquitoes access.


 My water stash. You never know when the well might stop working due to a power outage. Yes, it's potable. Yes, it's a lousy picture.


Begin by setting up a workbench near the chimney stack.


Remove the old kerosene barrel frame...as well as the wood walls around it. Most every piece of wood down there shows powderpost beetle damage. Most has got to go.
 

And just WHERE did it go? Out that damned mosquito hole, of course! One of my two readers said that it looked like the house had vomited wood, and so it does. Hey, Jay! And it did, with my help. Very little was worth saving, as it was beetle-damaged. Infested? Possibly, but it's easier to get rid of than to treat. I WILL be treating the entire cellar with Boracare once it's cleaned out. Behind the wood is the area Speckle ate. I guess I'll have to get some cedar shakes to repair it, though I will eventually strip the entire back side to expose the original siding. All in good time. Instead I expanded the electric fence to give her some incentive to stop eating my house.


This was a potato bin. I will be turning the cellar into a cool storage facility in time.


One of the five original joists from when the kitchen was the only room. Though they look completely compromised, the damage has left more than half of the thing intact. I can work with that.


I chopped away most of the compromised wood and was left with this. It is quite solid. Note the hand-hewn joist to the left.


One of two original sill plates from the 1690 house. Still as solid as when it was built, prolly because they are chestnut. Bugs don't like chestnut. I assume they've been down here since 1700 or so. The plates, not the bugs. Then again....


Removed the bricked-up cellar window, beyond which, the 1939 bedroom addition looms. This window was used as a coal chute at one time; holes in the floor show where hot water lines fed radiators before 1938. Note the brick and stone pile below; it came from the chute. A perfect place for a wood rack.


This post below the chimney girt joint needed resetting. I jacked the girt just enough to take the weight from the post, then put a flat stone beneath it. Once the jack was removed, the post and stone were tight and nothing moved.


What's left of the old 1690 structure was used to korbel out the hearth when the chimney was built. It must have been a hell of a substantial structure if the timbers are to be a guide. These were 5x5 joists, or so I suppose, as they are twelve feet long and have square ends. Tenons with trunnel holes can be seen at the end of the joists. Note the hand-hewn joists and chimney girt above.


The area behind the torn-out wall by the kerosene frame. Note how the joints between the stones are not opposite one another as they should be. One on two, two on one; that's how walls are built from stone. I am of the opinion that this wall was either a later addition or rebuilt by a moron. There is a squared-off pile of washed-in soil is at the base; it was built up behind the removed frame wall. I had some time to look at this because I also put a chair, reading light, and a couple of tables from this camera position. I spend evenings down there when it's too hot in the house. Usually listening to Old Time Radio.


This joist was shaved down and new 2x lumber was added to it, effectively sistering it. The sisters were set to be supported by the wood above the door, which was also replaced.


Apparently someone else had the same idea years ago, but they did it badly. The sisters also had boring beetles throughout. I removed them and shaved the joist; it was fine.


The joist holding up the floor of the porch. It is an 'entry' to you rebels; we Yankees call the little four-by-four portal inside the front door a porch. Personally, I like the southern ideal of a porch being forty feet long, where I can live half of the year. This ain't the south; the bugs keep you inside in the summer and the snow does the same in the winter.
It shows a little deflection after three hundred years, and is, believe it or not, quite solid. The room above is too small to lift, though I will be lifting the joists below the kitchen.


Those striated pieces of wood above the joists are thin pieces of chestnut, somewhat worn from absorbing moisture of the cellar, then shedding it. These are 'sleepers,' strips of wood that are placed below the slabs of chestnut flooring above. The flooring has no tongue-in-groove design, and needs the sleepers to keep the cold air from seeping back up into the room above. It's an eighteenth-century thing.
Unfortunately, due to their thin construction, the constant moisture gain and loss, and the weight of the heart pine floor on top of the chestnut floor, the sleepers have desiccated and rotted, collapsing below the floor. So the floor above has no support in many places and moves as it is walked upon.
What to do?
I had to think on this one.
.

I decided to remove as many rotted sleepers as I could after removing the plywood some moron screwed to them from below. This was likely done to hide the damage when the house was up for sale. I saw the cheap repairs and bought it anyway. But what could I do to replace them? I needed to make up for the lost sleepers.
A hint; look at the far joist......


So I decided to get out of the cellar and do some yard work. Here is my 150 year old boxwood, replanted last year. The plant is growing (see the greenery in the middle? Boxwoods grow very, very slowly), but I just HAD to turn the old branches (trunks) into arms on which to hold plants. I cut some teak, sealed the trunk ends, and screwed the teak to the trunk ends (after squaring and levelling them, of course). Teak is very resistant to water infiltration.
Apparently it was a cool weekend in the summer.


I cleared the old garden, which had been taken over by poison ivy. I itched for a week.


I cleared by the south wall, but left the peonies (in the center) so I could divide them in September. Wait! That's now! I guess I know what I'm doing this weekend.


My yews, which show damage from the big wet snow earlier. They are recovering nicely.


Morning glories before planting in the ground. They are quite huge now.


Speckle panting through her teeth.
 

Speckie and Cheerio enjoying Cheerio's new window seat. She pretty much lives there, watching the birds. She gets very excited when the chipmunks emerge. Note the wires on all sides. I have no Teevee, internet, phone, or cable, but I got wires. Speaker wires, mostly, so I can listen to radio in the cellar, attic, back room and back yard. I get GREAT radio here; eight (and sometimes twelve) different community and public stations. I support the most needy.


A collection of wood windows from the greenhouse, wood frames long rotted away as I cleaned the pile. But the glass that was left is Colonial! Very distorted it is, he said in his best Yoda voice.


Some chestnut sections from a torn-down church behind the glass. Wormy on the outside, clear on the inside.


Some pics of the yard after the spring-planted grass has established itself. Under the apple tree, to the corner, and beyond.


Back to the cellar as the heat returned. I cut the area below the damaged joist to ready it for the new dropsill that will support the lifted kitchen ceiling. Here you can see the solution to the rotted sleepers. Wedges hammered into the flooring joints so that the floor will lift when the joists are jacked. The wedges are installed from both sides of the joists. No nails, no glue. Just pressure.
 
 
I already showed you this pic, but now it makes sense. It's section of sleeper-free flooring ready for wedges. You have no idea how much trouble it is to get the old sleeper material out....
 
What, you thought restoring an old house is like what you saw on TeeVee?
Ha Ha Ha Ha!!!!

Tuesday, July 19, 2016

YEAH, WELL, IT'S BEEN A WHILE, HASN'T IT?

I haven't been so well this spring. First some extreme shoulder and back pain, then my dreaded hay fever, which hasn't shown its face in two years, came back with a vengeance. Add to that that I no longer have internet at my house (nor phone), and you'll see why I have been away.
But the work hasn't stopped. I decided to redo my kitchen as my wintertime project, and here it is a week past Independence Day. Well, my ceiling is done, anyway.

 
Empty shelves and dropcloths. The sheet strips keep the few kitchen necessaries I didn't move to the other room from becoming trashed during the ceiling project. You'll soon see why.


The shelves are from the fifties or sixties, maybe even seventies. The windows are mid 1800s, installed in 1939 when the Izbickis turned it from a derelict into a home.


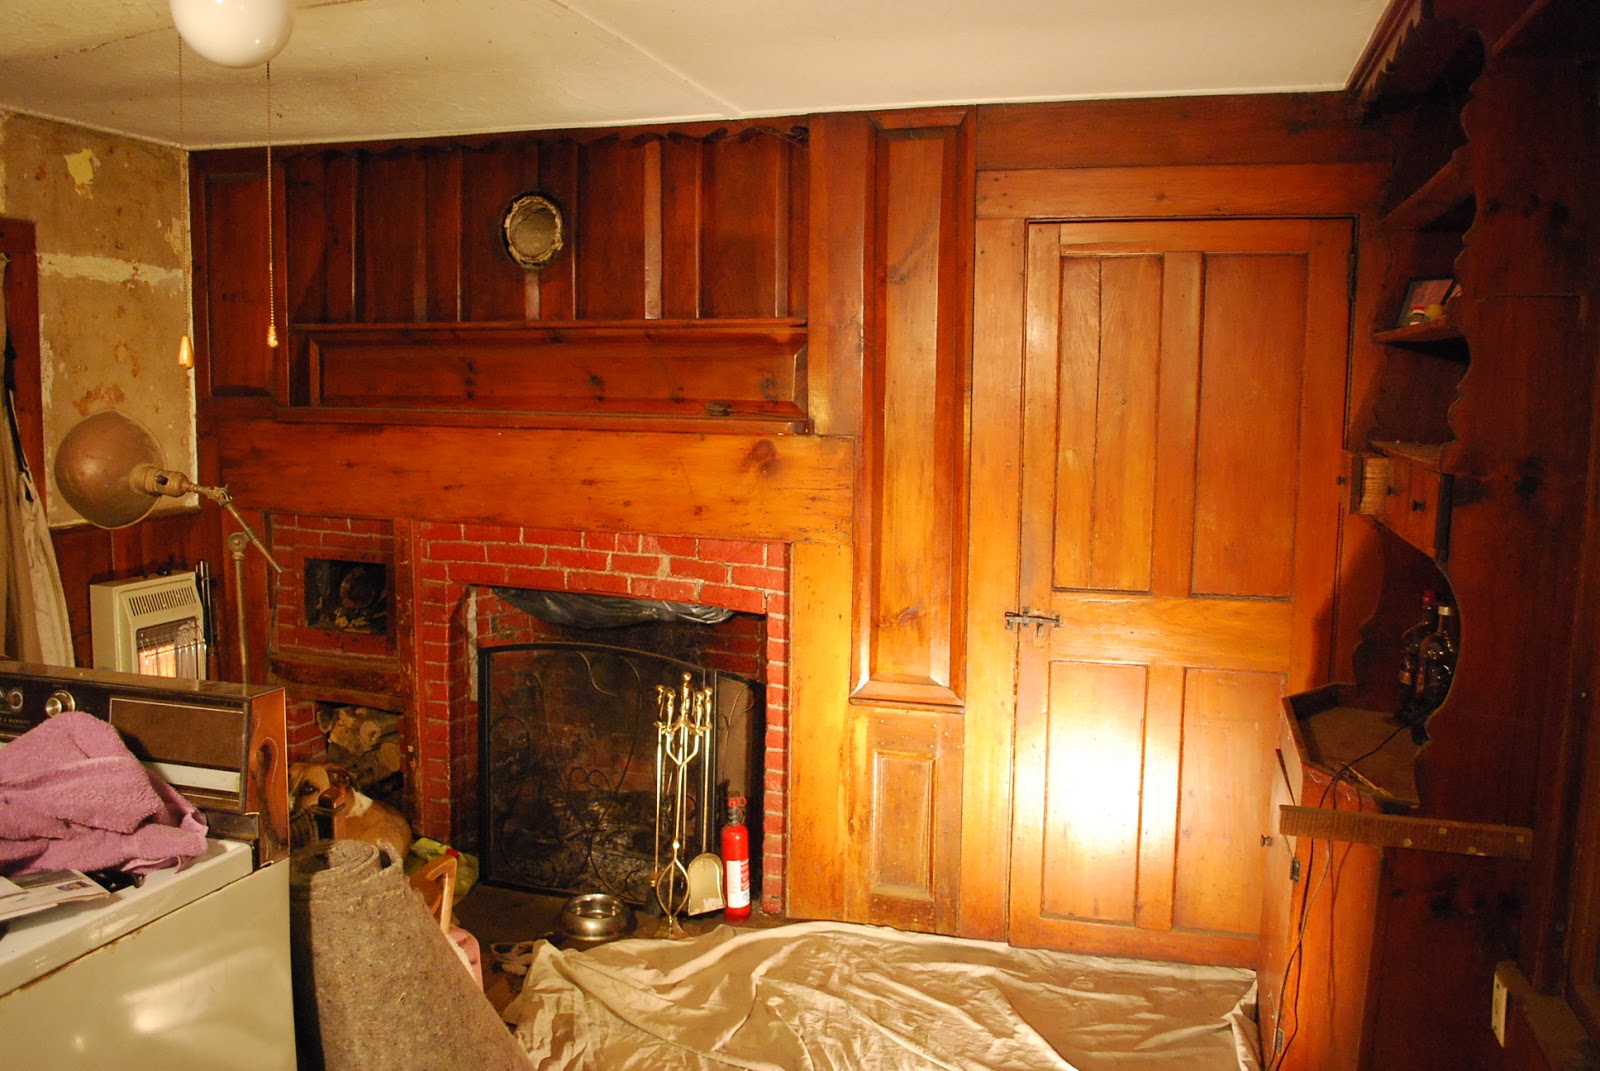
The door, lower panel to the left of the door, door frame and fireplace surround are all from the early 18th century. All other paneling around the mantel is 1970s. Nice work, though.


All original woodwork was painted, then stripped in the 20th century. Basic Cape Cod style homes were seldom varnished or shellacked.
 

Obviously taken in winter. January, in fact.


Clay tile pipe for the old woodstove with nice fluffy asbestos around it. It has been filled with mortar but can be put into service again. I have no intention of doing this. The ceiling is 4x8 fiberboard with lattice strips hiding the joints. It was skim coated with some sort of drywall mud, which cracked and crazed, then the sheets began to disintegrate and bow downward.

 
One of the cabinets, presently housing essential potables. This will become the stereo/bar/TV shelf and the shelves above will have strange art. I do not need this much space for dishes, which will become dust catchers anyway. So will the art. The potables don't last that long.


The door to the laundry/mudroom, eighteenth century. Note the chopped off lower rail. This door was not original to this spot, and if you read on, you'll know why I know that. The refrigerator space is under the second story stairs, a steep ship's ladder type. I had suspected this was an old entry to the cellar, but unless it had a real ladder, this was not the case. Not enough room for stairs and no signs of wood stair attachment points.


A veritable time capsule of wallpaper, including newsprint from the oughts and teens. Note the plywood wainscot below. Definitely not eighteenth century. So it has to go, to be replaced with antique southern yellow pine in a board and batten style. The next phase of the Kitchen.


Ah! This is the thing for which I was searching. Plaster! With horsehair and jute fiber binders as well.


An old brass light switch, very dangerous. It has been disconnected and the wires removed. I have also removed all of the overhead lights in the house. I HATE overhead lights, as they spread harsh light and detract from the overall Colonial appearance. Or any other old-house style as well.


Original 18th century finger latch, showing wear from fingernails on the pine door as well and wear on the hand-forged metal. The keeper used to be a bit to the left, if the old screw holes and wear marks on the metal are to be believed.


That darned plywood panel again... soon to disappear forever!


The dirt work begins. Stripping wallpaper is the easy part. The ceiling has been furred down and leveled, just like the living room. The original joists show the lath and plaster marks.


Holy Hell! The ceiling has been lowered almost five inches on the outside girt and nearly two at the fireplace girt! These people were plumb level crazy! Note the up-and-down saw kerf marks on the joists, prolly from a local water-powered sawmill.


Mid 19th century casing trim cut into blocks and used as nailers. Good looking trim, that. I doubt it came from The Standish house, though.


The fiberboard came down is two by eight foot strips, all filled with all manner of nasty surprises. Rat and mouse feces abound, along with stamps, buttons, board game pieces, and effluvia from upstairs. Yes, I wore a respirator and kicked out the dwawgs when I did the work. This particular piece had a rat's nest in it.


Complete with Bre'r Rat. Mummified, of course.


This pic is archaeologically significant. It shows the joist above the door into the mudroom. And just why is it significant? Look at the plaster lines; they prove a plaster ceiling once went from one side of the house to the other. The door, though old, was added later. Along with the entire wall.

 
Just like the living room, the end girt is made of pine and the chimney girt is chestnut. In Colonial houses, Plates carry the roof rafters, Girts join the plates together. Sills are what the wood studs sit upon above the stone foundation. This particular pine girt (originally the end of the house) has been chiseled out to allow old electrical lines to be passed through. They never intended for the girt to be exposed, and at the time of this photograph (January), neither did I. I intended to do the same faux/hand hewn ceiling joists running the opposite of the joists, so the hacked out holes didn't bother me.
 

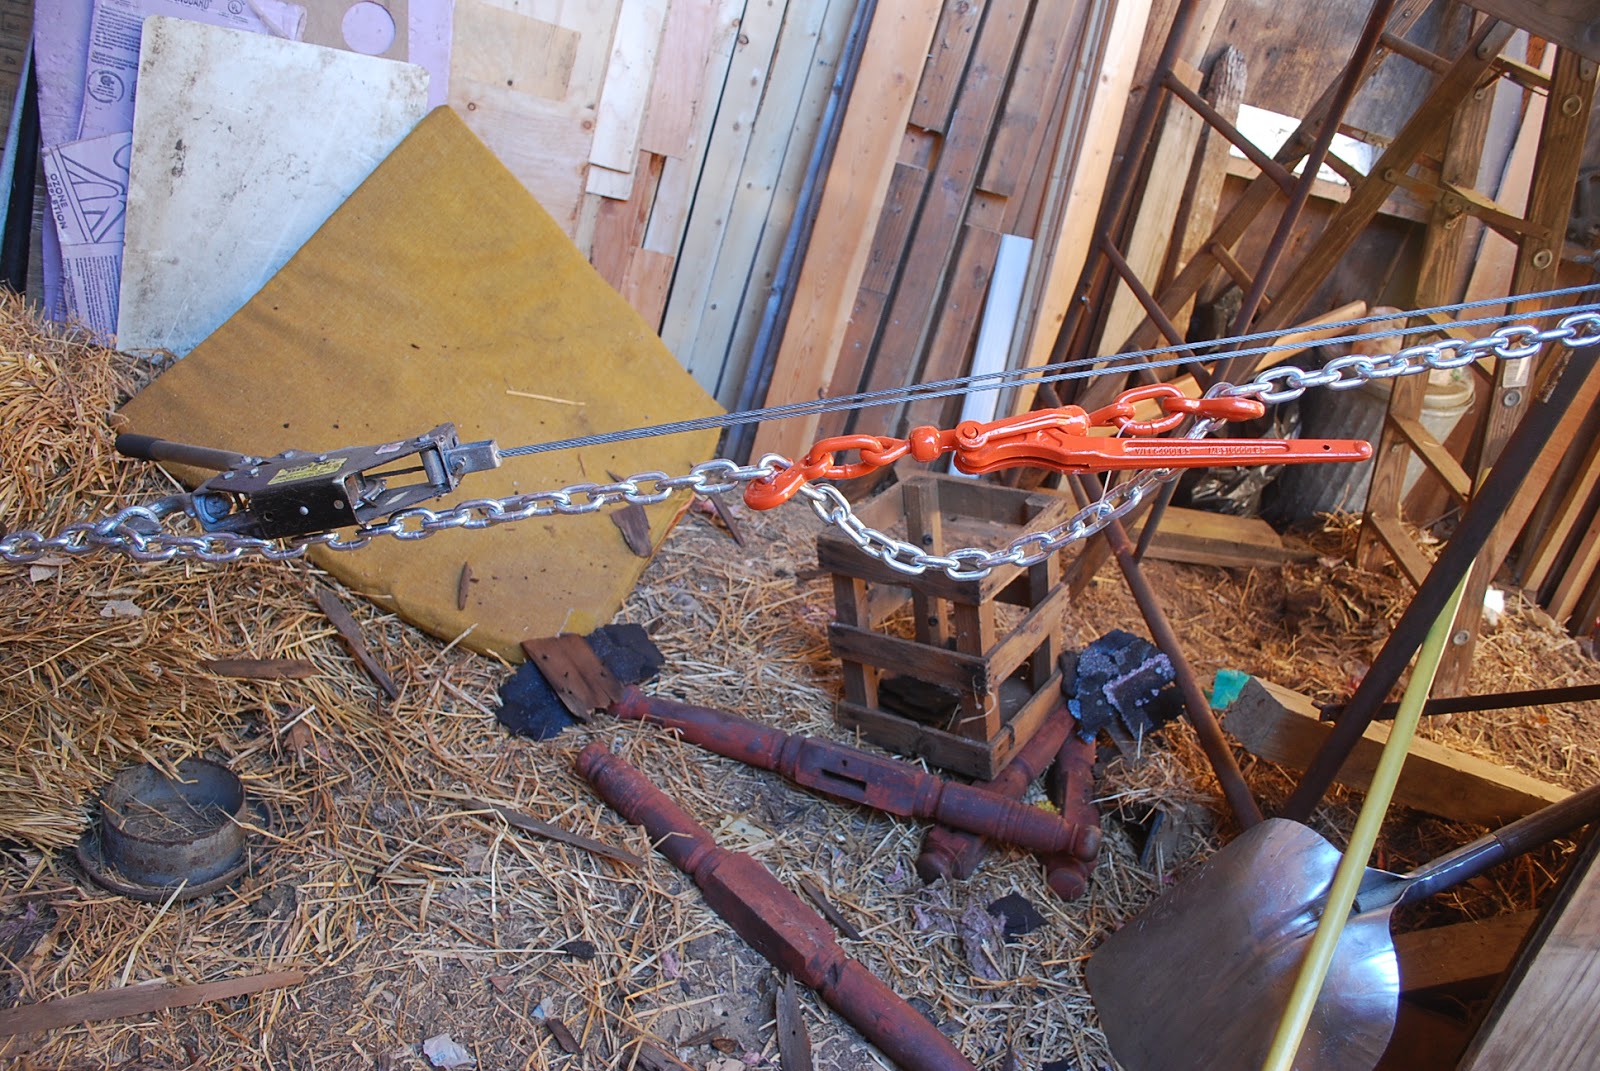
Then, like a dream, the snow melted in February! I had stripped the entire ceiling but I needed fresh air, and I figured this was a temporary aberration. It wasn't; by March, daffodils were blooming. So I took advantage of the weather, suspecting heavy wet snow would follow. It did, look back in the blog. I had to shore up the barn roof, as it was beginning to collapse. Wet snow might finish it.


New rafters from 1825 hemlock


Temporary ridgepole supports from the same, originally sleepers from a Pennsylvania barn.


Back in the kitchen, I found a deep check in the chestnut chimney girt. Since it holds up the joist tenons, I decided to screw it back together. For luck. The screws were hidden upon finishing. But if I was going to cover the joists and girts anyway, why should this matter?

 
An electrical line I had to abandon. It was at this point that I realized a problem unforeseen; the shelves were built long after the ceiling, and removing the latter would leave a huge gap of almost seven inches on the end wall (three or four here).
  
 
Other, larger critters lived in the ceiling for a time; one left this huge turd. A coon, most likely.
 
 
Now, at this point, I must confess. I am the owner of this house, but whatever lives here lets me do so at its/their pleasure. I am here to do its bidding.
I'm convinced of this.
So when it tells me to do something, I do it. Sure it seems to come from my own mind, but I know better.
Case in point.
After stripping the ceiling and removing all the blocks, dirt, fiberboard and nailers, I stood with my ass against the sink one night and looked at it carefully. Through the door to the front 'porch' (a term for a Cape's 3x3 interior foyer), I could see the living room ceiling, with its faux joists running the opposite way. I liked the view and was contemplating on just what I needed to do to copy that ceiling in this room when I suddenly knew. I COULDN'T DO IT.
I had to expose the original joists and plaster between them.
I HAD to. It's what The House wanted.
I tried to argue with it.
"But it'll show all those plaster lines! These joists were never meant to be exposed! And what about those damned gouges in the end girt? They'll show!!!"
Grrrrr....
"And do you know how much trouble it is to install drywall between joists, then to float it and paint all those joints cleanly?!! Do you??!"
I sighed and resigned myself to The Farm's Desires.
I only hoped it would look okay.
 
 
First task; installing blocking and nailers for the new trim that would have to be installed above the shelving. I had no idea just what it would look like, but I knew how wide it would have to be.
I also needed to add a joist above the windows. The old joists were on sixteen inch centers and the space above the windows was twenty five inches wide. And where would I get a rough sawn joist with dark brown patina?
In my garage, of course. I collect such things and actually brought a stack of them from Arkysaw. But the original joists had up and down saw kerfs from a water-powered sawmill, and my Arky wood had huge circular saw marks. Oh, well. Donatello Nobody.
 

I installed 1x4 nailers (scarfed from a demo in Hadley Mass for free, my favorite price) to the joists and installed R13 3 1/2" fiberglass insulation. Not as thick as in the living room, but it'll have to do.


Blocking for the 'high' end of the ceiling, almost ten inches higher than the removed dropped ceiling. Note the light orange stripes on the scrollwork trim, the removed trim's ghosts; this person didn't like the 'settled' lines of the 326 year old house and straightened them.
"Didn't you have any toys as a kid?" Ray asks Egon Spengler in "Ghostbusters."
"We had a slinky, well, half a slinky. But I straightened it."
That's the way I feel about 'straightening' and old house's lines. Don't.
I decided the space was too great for a single horizontal piece of wood, so I kicked out the top block 1.5 inches for a two-tiered, corbelled effect.


Still have to deal with those damned gouges...
 
 
Plaster floating begins after the drywall is screwed to the nailers. First thing is to use a hard plaster between the wood and the drywall. Oh, actually, first I cleaned then lightly sanded and varnished the joists to make sure the excess plaster would wash off and the up-and-down saw kerfs would stand out.
The plaster lines faded with this action; still there, but much less visible.
 
 
I removed the loose wall plaster and screwed pieces of drywall to the lath.


Then I used the same setting-type hard plaster to smooth the wall, finally floating it with drywall mud. As in the living room, I left the ridges high and made the plaster purposefully uneven to mimic a Colonial style of plaster.
 
 
The girts truly show with this style of wall treatment.

 
 Drywall floated, first coat.


Easter Sunday, I remove that ugly plywood wainscot. And look what the Easter Bunny brung me!
 
 
A piece of ORIGINAL paneling matching the one by the door to the porch (go back and look to the left of the door, near the floor). But this one has PAINT, so I can do a sanded core sample and see what the original color was. I have no intention of stripping it, either. It will be a museum window. Note the missing piece broken at the top where a nail snapped the grain line.
 
 
Corner cleaned and ready for new electrical lines, outlets, insulation, and wainscot.
 

Ceiling and plaster walls finished and painted. I always intended to do a Wedgewood blue here. Cool versus the warm of the wood


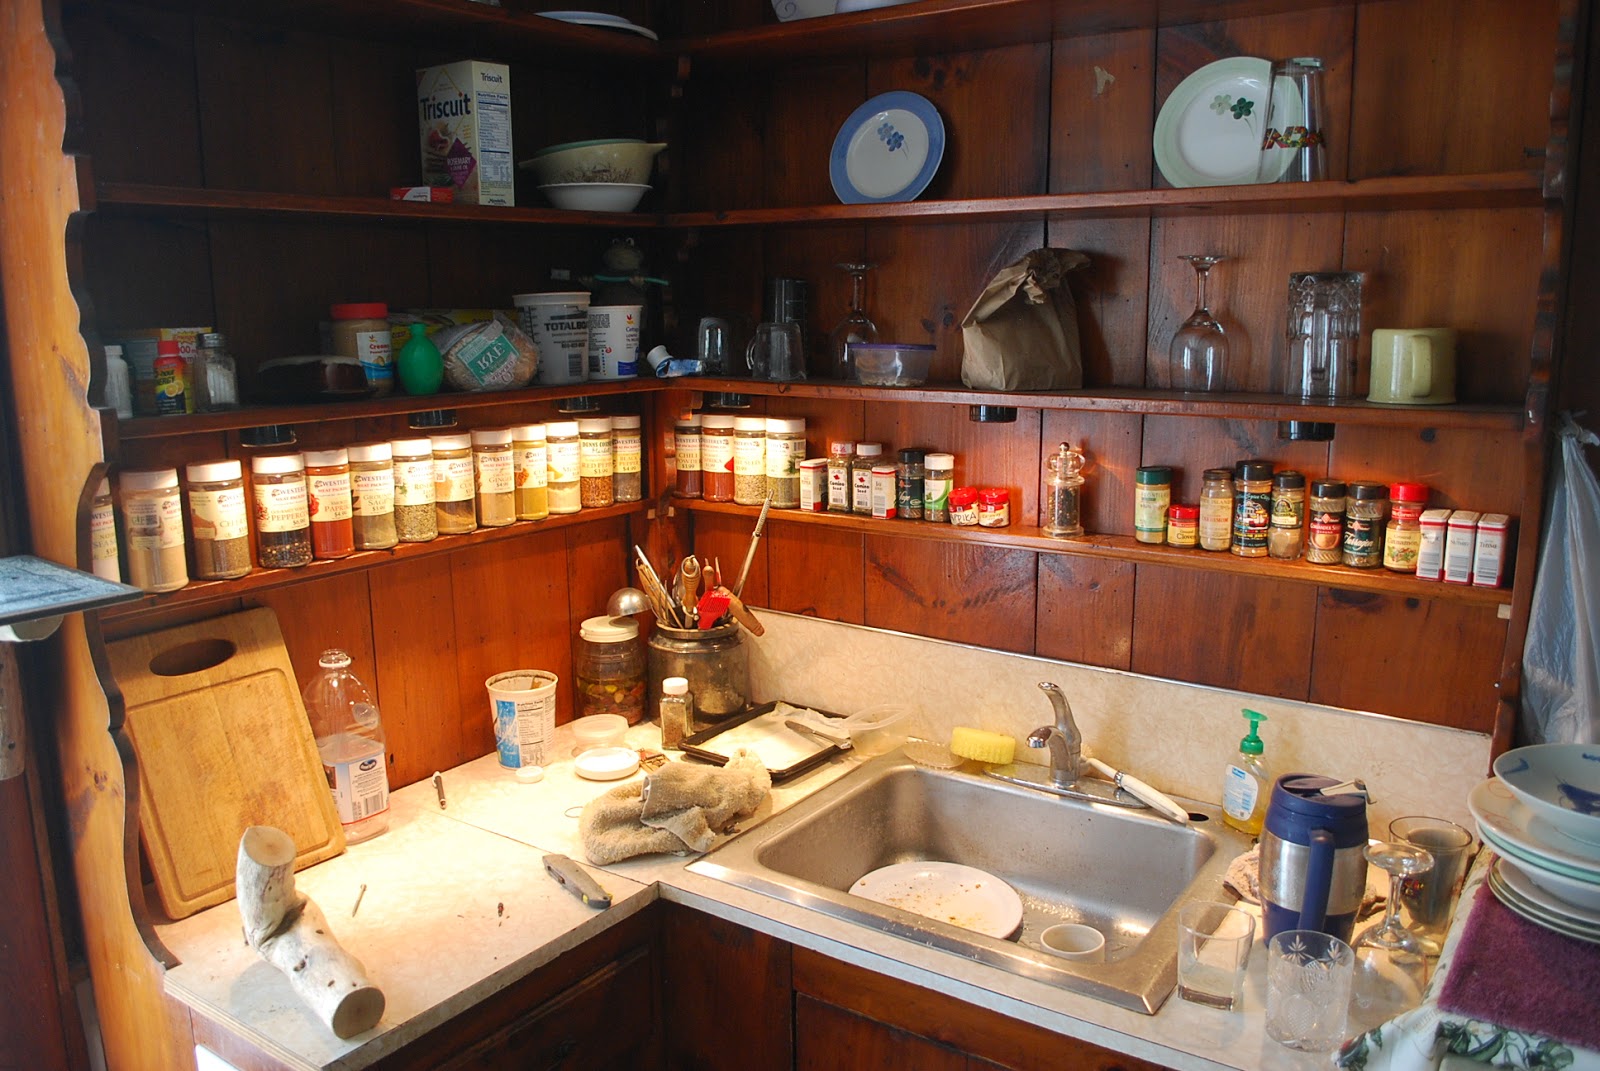
 I even cleaned the woodwork and transferred appropriate pieces of pewter, crockery, and old bottles onto the mantel. Thanks for collecting Colonial decor, Ma!The pic is of The Standish House, of course. If you look really closely at the kitchen window, you can see this same scene in the painting! No? I just realized I never took good pics of the new trim. Maybe if I look back...Nope. I'll include some as I start the wood trim phase next. Note my Colonial desk in the porch, in front of the front door. Front doors in Capes are seldom used. Note that I removed the door entirely; I also removed the mudroom door. This really opened the kitchen, but both will need to go back when the cold weather returns. It was ninety two here yesterday.

 
It inspired me to install under-the cabinet lights and a spice rack. I have yet to put a wood strip up to hide the lights, but wait until you see what I'm doing with the lighting! That'll be next, and it won't be six months before the next post....I'm working on it as I write. Well, not literally, or you'd never get this.
NEXT: Wainscot and lights.